Hello 7'ers,
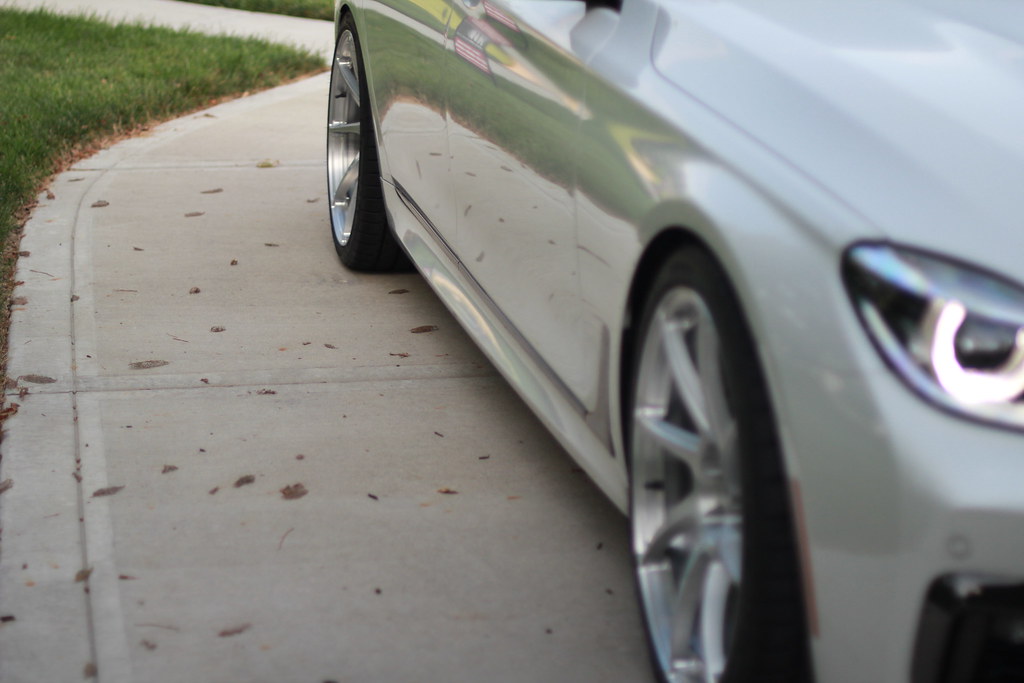
Since the day I had my 750, I've been holding off on getting wheels until someone released a lowering solution. The stock ride height left a huge wheel gap so it would look very odd with more aggressive wheels and tires.
I hope the DIY write-up below is helpful. I'm very cautious of not breaking the sensors or bending any brackets, so I did it the harder route by pulling all brackets off the car then swap the links. Better to be safe than sorry they always say. You could do this without removing the wheels, but it's much easier with the wheels off. Total project time is around 2hrs.
AP Links Product Info (Advance Performance Link): http://advanceperformance.com/news/?p=2510
Purchase Link: http://www.ebay.com/itm/2016-17-BMW-...-/152456012170
Wheels: Signature Fully Forged Monoblock SV108 - 21x9 ET15 front and 21x10.5 ET30 rear (7LB lighter per corner compared to OEM 20")
Signature Wheel BMW
Tires: Michelin Pilot Super Sport - 255/35/21 front and 295/30/21 rear
Tools Needed:
- Floor Jack
- BMW Jack Pad Adapter (I use Burger Tuning jack pad adapter)
- Ratchet and 10mm socket
- Torque Wrench/Ratchet and 17mm socket (to remove the wheels, optional)
- Caliper Measuring Tool or Tape Measurer if you don't have a Caliper Tool
- Plier
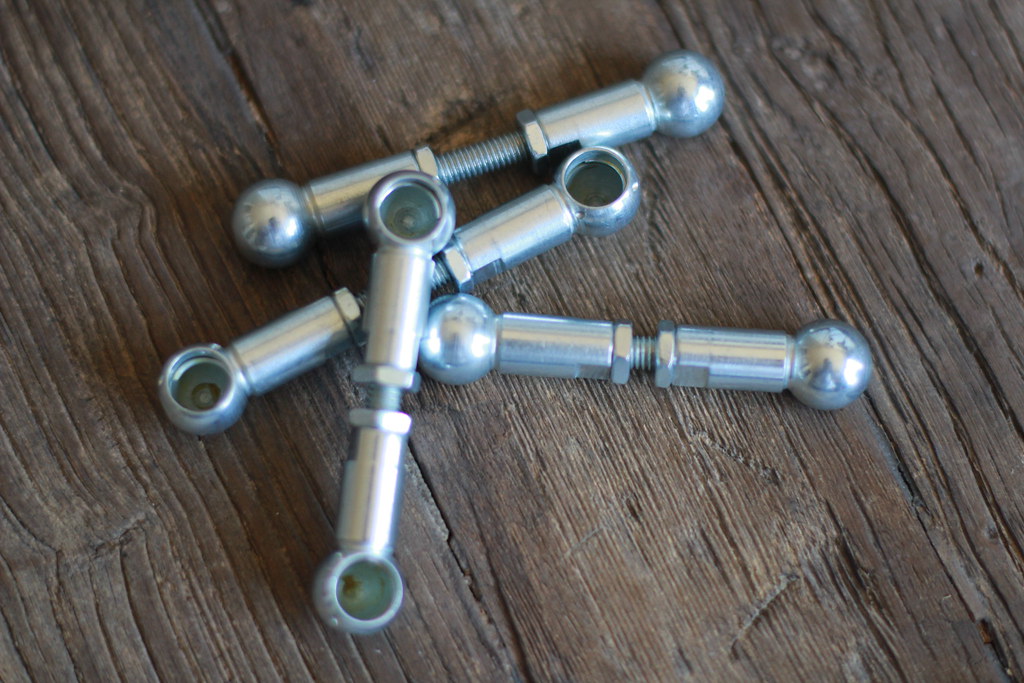
AP Performance Links Includes:
- Installation Instructions
- 2xZinc Plated Front Lowering Links (Shorter - Pre-adjusted 1/4" Longer = 1" lower ride)
- 2xZinc Plated Rear Lowering Links (Longer - Pre-adjusted 1/4" Shorter = 1" lower ride)
***Park your vehicle on a flat/leveled surface, then measure all 4 corners from the ground to the fender lines. You can then determine how much you'll need to lower based on your taste. I only lowered mine by 3/4" all around.***
Front Lowering
1) Raise the front of the vehicle, remove the wheel, locate the front links and remove the 2x 10mm nuts/bolts.
2) Measure the links to make sure the new links are about 1/4" "Longer" than the factory ones.
Lengthening the the front links by every 2 turns = 1/4" lower ride height.
3) Swap the links and reinstall the brackets with the 10mm nuts/bolts. Do not over-tighten the 10mm nuts/bolts (around 6-7ft-lb or the same force required to remove the nuts/bolts).
4) Reinstall the wheel, lower the vehicle, and repeat the other front side. Torque the 17mm wheel bolts to around 102ft-lb.
Rear Lowering
1) Raise the front of the vehicle, remove the wheel, locate the front links and remove the 2x 10mm nuts/bolts.
2) Measure the links to make sure the new links are about 1/4" "Shorter" than the factory ones. Shortening the the rear links by every 2 turns = 1/4" lower ride height.
3) Swap the links and reinstall the brackets with the 10mm nuts/bolts. Do not over-tighten the 10mm nuts/bolts (around 6-7ft-lb or the same force required to remove the nuts/bolts).
4) Reinstall the wheel, lower the vehicle, and repeat the other front side. Torque the 17mm wheel bolts to around 102ft-lb.
***Once completed, drive the car around (in sport mode if you have it) and then park at the same location you measured to see if they're evenly lowered all around. If not, you'll need to make minor adjustments to the links until it's even all around. After making adjustments you'll need to lock the nut. ***

Hope you'll appreciate this DIY. Cheers.
