So i really love how the M3's have the black center console in them and decided i wanted it too so heres a quick DIY for the project.
Parts list:
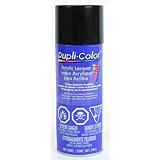
1-2 cans of Duplicolor Acrylic Lacquer in whatever color you like (I used flat black for a matted look)

1 can of Duplicolor Adhesion Promoter

1-2 Duplicolor Prep Wipes (pretty sure its just paint thinner)
3m blue painters tape
OR
1 Can of plastidip (see bottom for more info on this one)

I'm sure you could do this on any trim but you might have to scuff the clear coat so in that case I would recommend a fill-able primer instead of just the adhesion promoter.
1. Remove the trim pieces from your car that you wish to paint. Use an old credit card in front of a flat head screwdriver (as a buffer from metal to metal contact) to pry the trim pieces up (refer to the interior trim swap DIY guide if you need more info on how to do this)
2. Once your center trim is removed, unscrew the ashtray box from the center piece, and then pop the ashtray top off with your screwdriver. Also make sure to remove your iDrive module or coin tray from the center piece.
3. Now you have the 2 paintable pieces so its time to mark off the edges with the painters tape. It's not 100% necessary but it makes for a better fitting job instead of having paint all over the plastic parts.
On the center piece, I left most of it exposed except the part for the gear shifter and the 2 sides of the opening for the coin tray (image below)
You'll also need to do 3 sides of the ash tray cover where the black plastic is showing.
4. Once you've taped off, grab your prep wipe and make sure your painting surface is cleaned properly and wipe off with a clean towel.
Now take the adhesion promoter and spray on your first coat to all pieces, trying your best for an thin and even layer that hits all the surfaces you want to paint. Let you 1st coat sit for about 3 min. Now apply a 2nd coat using the same method. Let it sit for about 5-8 min after the 2nd coat is applied.
5. OK so now after letting your 2nd coat of adhesion promoter dry a little its time to paint.
Make sure to shake your paint can well before starting. The 1st coat should be light.
Let your 1st coat sit for 10 min. its normal if you don't see too much paint on the trim afterwards, your 2nd and 3rd coats will be a little thicker.
Now for your 2nd coat, go a little thicker but not too much as you still want to do 1 more coat of paint after. Wait another 10 min between coats.
Time for your last coat of paint... the more light coats the better.
Notice the darkness between the 2nd and 3rd coats... after your 2nd coat you want it ALMOST all black but not quite and your 3rd will "top it off" so to speak.
The paint can says you can handle 1 hr after last coat is applied, I let mine sit for about 3 just to be safe.
End product:

OR
If you want a more OEM plastic look, just replace the paint with plasti-dip. You get a rubbery textured look. DarkCyd_Turbo and I tried it out and it looks AWESOME. Plus if it doesn't turn out right or you want to change it peels right off with no permanent lasting effect. If you go this route, no need to prep, prime or use adhesion promoter... just spray a few quick thin layers of it (more if you like), let dry for 4-5 hours (overnight is best) and you are good to go!
End Product


-Badger